Serious snow removal
January 27, 2014
For the last week I have obsessed about UTVs in the manner of someone gearing himself up to buy a new one. Of course I prefer the used market, but there’s a scarcity of worthy machines for the compulsive tire-kickers of Kijiji to examine.
The few UTVs which are for sale generally have plows attached and look as though they were equipped on the dealer’s order books as ultimate-snow-removal-machines-for-country-properties. That role in Eastern Ontario belongs to a 75 hp, 4WD farm tractor with loader and 7′ snow blower. Anything less is a toy.
I wandered over to You Tube to look for videos of Polaris Rangers plowing snow. There were quite a few, but each video featured a Ranger scraping along a driveway to remove three or four inches of snow. The videos never show the important parts: the beginning and end of each run. Where do the guys put the snow? What happens when the drifts get big? or the township plow completely fills in your driveway?
Snow storage isn’t part of the job; it’s the whole job. I can’t see how a small plow can help.
A couple of years ago I explained to an uncomprehending friend that the purpose of a homeowner’s snowblower isn’t to blow snow, it’s to take the snowbanks created by passing plows and pile them in places higher than the owner can reach with a shovel. For that reason alone the blower is worth garage space: it lets your driveway continue to operate at nearly full width until spring by finding creative places to store snow. The top of a hedge is a reliable storage place: usually your neighbour won’t catch on until he tries the same thing from the other side and discovers the space is already full.
Around Forfar we don’t even bother with snow until it gets up over six inches, and what would one of these expensive, light plows on a Ranger or Rhino do if it encountered the four foot drifts I had to deal with this morning?
Even with the tractor-mounted snowblower I’d had my work cut out for me. Fortunately the cab on the TAFE kept me dry while the blower tossed the snow up in the air, after which the wind whipped it away to become some other township’s problem. The first trip out the 600′ driveway wore out a 7/16″ shear pin, though. The new one held for the rest of the morning’s job, though as I broke for lunch the white stuff was drifting rapidly back into the gap I had created.
When the township plow goes through on my side of the road I’ll get to do the whole thing again. A tractor’s designed for the constant shifting and rough use it gets moving snow. Repairs to old tractors are relatively cheap. Rangers are wonderful machines for light hauls, dog-walks and people-moving. I just think repairs are too expensive to abuse these machines with snow removal duties.
Lexus Service
December 20, 2013
The heater fan on our 2005 Lexus ES330 was noisy on its highest setting and I had learned to live with it. But lately it seemed as though its output was diminishing so I looked online for fan prices and videos on changing it out.
The job promised to be a lot easier than on a Volvo. I remember taking the entire dash apart on the 1984 wagon (including steering wheel and speedometer removal) in order to extract the very expensive fan. I don’t remember its cost, but it was enough that I tried to repair the old one.
The Camry/Lexus fan seemed cheap online, and the video showing the replacement procedure ran for only 15 minutes. Because Toyota parts are often surprisingly inexpensive at the dealer, I called Kingston Lexus for a price on the job. Service manager Tammy had charged me a very reasonable $850 for a timing belt job, and hourly rates slide lower on older models, so I figured she was worth a try.
I stammered my explanation until Tammy broke in and told me to remove the cabin filter and vacuum the cavity behind it clear. Then reach in and fish the maple leaves out of the squirrel cage. She suggested there’s no need to take the fan apart and that my heater would be fine after cleaning.
When I removed the glove box and filter (I’d watched a video on the process the day before) I discovered a plugged cabin air filter and a squirrel cage beneath it which was about as well-stuffed as a foam pillow with bits of maple leaves and miscellaneous fibrous material which made me suspect the actions of a mouse. Indeed, the top of the filter seemed to have been chewed a bit, though the fine gray fibres may have been filter material rather than mouse hair.
My coarse vacuum hose wouldn’t go into the air box so I blew the material out to the vacuum with compressed air. Everything went back together as it should. Heater fan action improved immediately.
The fan repair’s total cost? Twenty minutes of effort in the shop.
Not bad.
First snow
November 27, 2013
About 8″ of soft, slippery stuff. My 2WD tractor was at a loss without tire chains attached, and I had little inclination to muck around in the slush to put them on.
So I hitched the 5′ snowblower to the small Kubota I bought to mow lawns and fields of tree seedlings. Its 4WD HST and compact size made short work of the snow.
Mind you, I did get very wet. The TAFE has a good loader and a cab with lights on it. On cold winter nights it may well still appeal, though for a moment this morning when the Kubota B7510 was chewing its way uphill on the slush while pushing a snowblower, I allowed myself to think about how the farm might run without any tractors larger than the 21 hp ‘Bota.

How do you pump a solid?
November 14, 2013
In 1980 I spent an entertaining evening at a bed and breakfast in Stratford listening to my host describe pumps. He was an engineer for a company which manufactures pipeline equipment and the things he told me stuck in my mind.
The most interesting one had to be their use of regular jet engines to drive natural gas pipelines: as an experiment they put one into a shed beside the pipeline, burned natural gas from the stream in it, vented the exhaust through grates to the air above, and sat back to see how long the thing would last. The trick with a jet is that the flow of air through the turbine actually cools it, so a jet runs very well in a shed without a fancy cooling system. When the prototype didn’t wear out they put more and more turbine engines in place. They found over time that the service life for a gas turbine in a pumping station is much, much longer than for the same engine in a 737. My host told me that they hadn’t had one fail yet.
So this made sense: it’s easy to pump a gas/fluid which readily provides fuel to the engines which drive it. The gas logically would move easily through the pipe without high pressures or frequent pumping stations. So that’s the design for the west-to-east natural gas pipeline.
A pipeline is a magical metaphor for politicians to use: things go in one end and come out the other and nobody needs to understand how or why. But the image I see is a jet engine choking on tar and the 1/4″ pipe wall gradually sanded away to nothing by the flowing bitumen.
Bitumen starts out as a substance hard enough that it takes huge shovels to chisel it out of the ground. It’s abrasive. It certainly is going to be harder to pump than natural gas.
So, you say, they dilute the bitumen with natural gas in liquified form? So they mix the bitumen and the LNG together and pump like crazy and when it gets to the other end they refine the whole mess into petroleum products.
Trouble is, everything I could read on Wikipedia about liquifying natural gas products emphasizes how critical temperature and pressure are. What happens if something upsets this delicate suspension? Do we get the pipeline plugged with tar from Windsor to Cornwall?
I don’t have a dog in this particular fight, but I’d be very interested to know how Enbridge proposes to pull off this feat with a 1/4″ thick pipe stretched across the country.
I’d really like to know some answers here.
Splitting a tractor Part II: 7 Rules for the Compleat Idiot
November 3, 2013
Today has provided a series of lessons:
1. When you’ve bolted everything back together and you’re all ready to do the triumphant drive around the yard in your recently-repaired tractor, the battery will be dead.
2. If the hydraulic pump makes a horrible noise when the engine starts up, don’t panic. It’s air in the system. If it continues to make an unpleasant noise while running, check the auxiliary levers in case one is stuck.
3. Splined shafts are connected to universal joints with spring pins driven through carefully-alligned holes in both. They require a wire run through the hollow pins with the ends brought back and twisted together outside the shaft. If you do not have any wire, stop the project at this point until you have some.
4. In the drive tunnel of a Bolens compact tractor there isn’t enough space for a pair of pliers to twist two strands of wire together if the front drive shaft is in the way. It must be removed again to complete the job. See rule #3.
5. Count the items left over in the parts tray. If there is a remaining spring pin, it came from somewhere. Find the universal joint with the missing pin before driving the tractor a mile into the woods on a test run.
6. A loud clunking noise doesn’t necessarily mean disaster. If the front drive shaft universal has a missing pin, it will eventually come loose when the tractor is running in 4WD. The same rig seemed willing enough to idle along in 2WD on the limp back to the garage, though.
7. Rod’s rule of 30: if you think you have made all of the mistakes possible in the installation of spring pins, you’ll discover one more. In this case I carefully pinned the errant universal joint just past the end of the drive shaft, allowing the shaft to fall out as soon as I had finished wiring the pin into place. Hey, it was dark in there. From now on I’ll look at the inside of the universal joint for the end of the drive shaft before pinning it.
8. Replacing a spline boss on a Bolens G174 is a lot like setting your hair on fire and putting it out with a hammer. If feels so good when you’ve finished.
UPDATE: 4 November, 2013
I used the Bolens all afternoon to move firewood into the shop. It’s good to have it back in service.
UPDATE: 26 October, 2014
The Bolens has seldom sat for long over the last year as there is usually something around the farm which needs to be moved.
With the dump trailer it has seen duty hauling firewood and prunings from the walnut and butternut plots.
It mowed under overhanging walnut trees with the 48″ bush hog this summer.
It jockeyed trailers.
The heaviest work it faced came on two construction projects of friends: it dragged a 5′ box blade to strip away clay and replace it with gravel under a large deck in Newboro, getting buried in wet clay in the process.
With the dump box it hauled about 35 yards of gravel around the footings of a new house near Chaffey’s Locks until the “Big O” pipe was properly bedded. Most recently I have put a tank of diesel through it while raking the leaves off the two acres surrounding the house with a Brinley 48″ lawn sweeper.
It was certainly worthwhile making the repair to the spline boss on this excellent and useful little tractor.
UPDATE: 14 July, 2014
The Bolens is still going strong, seeing action just about daily around the property. It is particularly useful in conjunction with the dump trailer.
Splitting a tractor
November 2, 2013
My trusty old Bolens G174 stripped a few cogs on its output shaft boss the other day, and sat there sounding like an annoyed pencil sharpener instead of pulling my trailer. A session in the garage revealed that it had stripped a spline boss on the shaft which transfers power from the engine and clutch to the transaxle at the rear of the tractor.
I found the part at Sony’s Bolens on the Internet. Then the problem arose: how do I split the tractor in half to make the repair? The shop has lots of tools and lifting equipment but I was loathe to tie it up for an extended period with a tractor hanging in sections from the hoist.
I asked my neighbour Peter Myers to supervise the first couple of hours of the project. He looked at the situation (the shaft and spline boss are visible from beneath the tractor, but blocked by the front drive shaft) and suggested we might not have to do the 10-hour take-apart prescribed in my service manual for clutch replacement.
He started with the front drive shaft as it was in the way. The manual directed him to the lower end after he removed the pin holding the rear (upper) end and found it would not slide forward enough to come off. The lower end is inside a heavy boot with a strong “O” ring and a bolt which looks like a drain plug. Peter removed these and found another universal joint which was easier to disassemble. As nearly as I can tell, one half of the front universal joint doesn’t take a pin, allowing it to slide on the splined drive shaft just enough to allow the rear universal to come clear of the transaxle.
We decided to split the tractor at the rear end of the drive shaft tunnel, where it joins the transaxle. Peter suggested a wooden block to support the rear half, so I cut two blocks off a 15″ walnut log, one 13″ and one 12″ in length. The 12″ piece worked with two 1 7/8″ pieces of plank on top and a 3/8″ shim to fill the space. A logging chain encircled the bell housing behind the engine and hooked to chain blocks attached to the bar across the top of the car hoist.
Before he left Peter warned me to wedge the engine and front axle together to prevent the engine tipping out of alignment when I split the tractor. (It still tipped a bit, but I corrected it easily by tapping judiciously on the wedges.)
First I had to disconnect the hydraulic lines from the pump and wiggle things around to allow the tractor to separate about 1 5/8″ to allow the spline boss switch. To free the brake rods, the rear pins came out. I also removed a pin on the differential lock. Then I removed four bolts from the front of the foot plates to allow the split.
All of the eight transmission bolts proved to be loose. I guess they had had lots of time to move around since 1980. The two bolts around the foot plates were hard to remove, but a 19 mm stubby wrench did the job.
It turned out that the output shaft will slide forward into the clutch a bit to make the job of removing the spline boss easier.
The old boss which dropped off the shaft (and onto my head) was worn quite smooth on the rear set of splines, so buying the replacement was a good idea. The rear shaft was far from perfect, but Peter suggested that with the new spline boss and pins it would likely run for a long time. A little oil and a few grunts and the shafts lined up for me to tap the spring pins into place.
Then I bolted the split halves of the tractor back together, ending phase 1 of the project.


The Bolens hydraulic remote project
October 18, 2013
I now have the Bolens G174 tractor set up to tip the new dump trailer, and therein lies a tale. As I may have mentioned I lost one critical bolt from the remote hydraulic rig which I had Peter Myers remove from the tractor three years ago. Actually I lost the whole thing, but I found most of it a month ago and tried to re-install it.
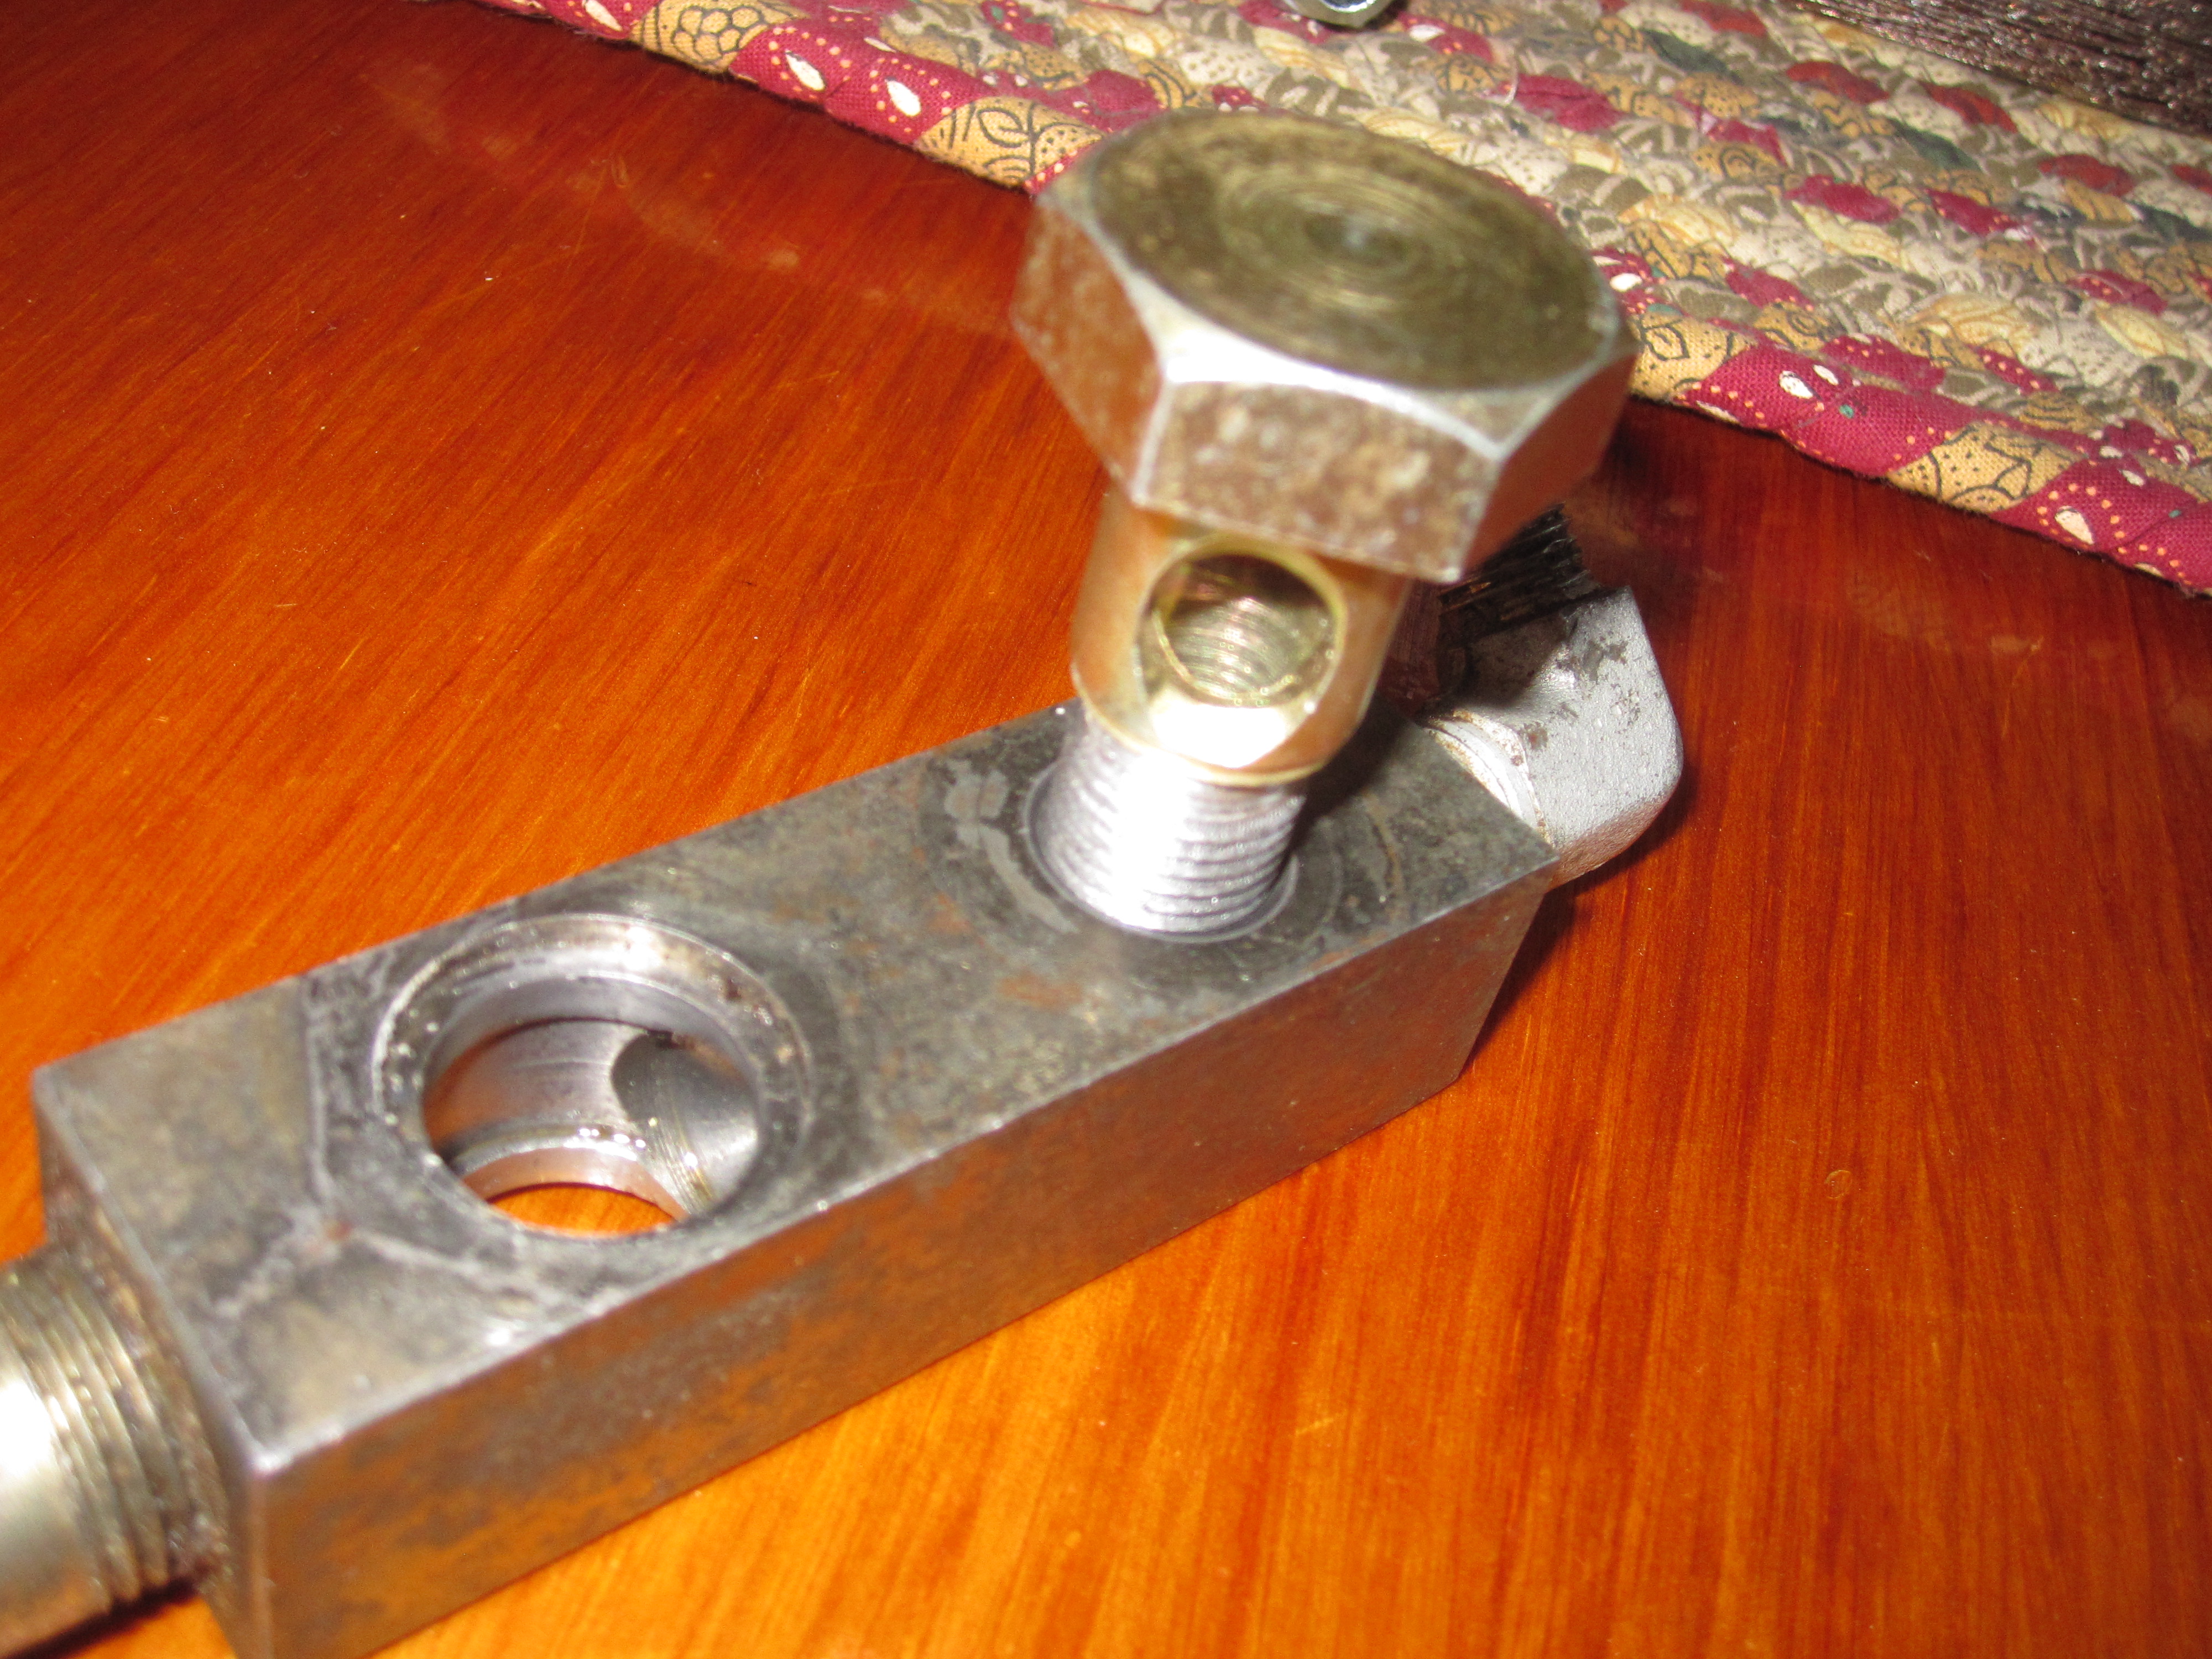
Over a couple of weeks I stared across a number of parts counters at bemused clerks leafing through catalogues. Most didn’t even know what a banjo bolt is. (It’s a hollow bolt with cutouts to allow the passage of high-pressure oil, as at the end of a solid oil line.)
One guy on Tractorbynet found a supplier of the part he thought I needed, a Massey Ferguson dealer in New Jersey. The parts guy was hard to get on the phone, but when we talked he agreed to order the part number the Tractorbynet contributor had suggested. Five days later it turned up at Wellesley Island, N.Y. for pickup.
The bolt was about the right size, but the threaded end was way off. For example, it had 19 threads per inch. A guy at Baxter’s in Kingston informed me only BCS bolts have 19 threads per inch. That’s British Cycle Standard. Not metric. He pulled a BCS nut off a shelf and it fitted. But I needed the bolt to thread into a 3/8 pipe thread. That’s an 18 thread-per-inch about 5/8″ in diameter overall.
I took the whole thing over to Peter and asked him if he could cut the bolt down and thread it to fit. He said he didn’t have a die of that size, but he could cut the threads on his lathe.
An hour later he turned up looking pleased with himself. He showed me the modified bolt, and after lunch he wrenched it into place without drama. The Bolens produces 1250 psi at the remote, and that’s enough to raise the dump trailer when empty. Who knows how much load it will lift? The Kubota produces about double that pressure, and it had to work hard to dump a yard of gravel. Of course firewood’s a lot lighter than gravel.
Anyway, this toy project seems to be back on track. It would have had a very different outcome without the help of Peter Myers and his metal lathe.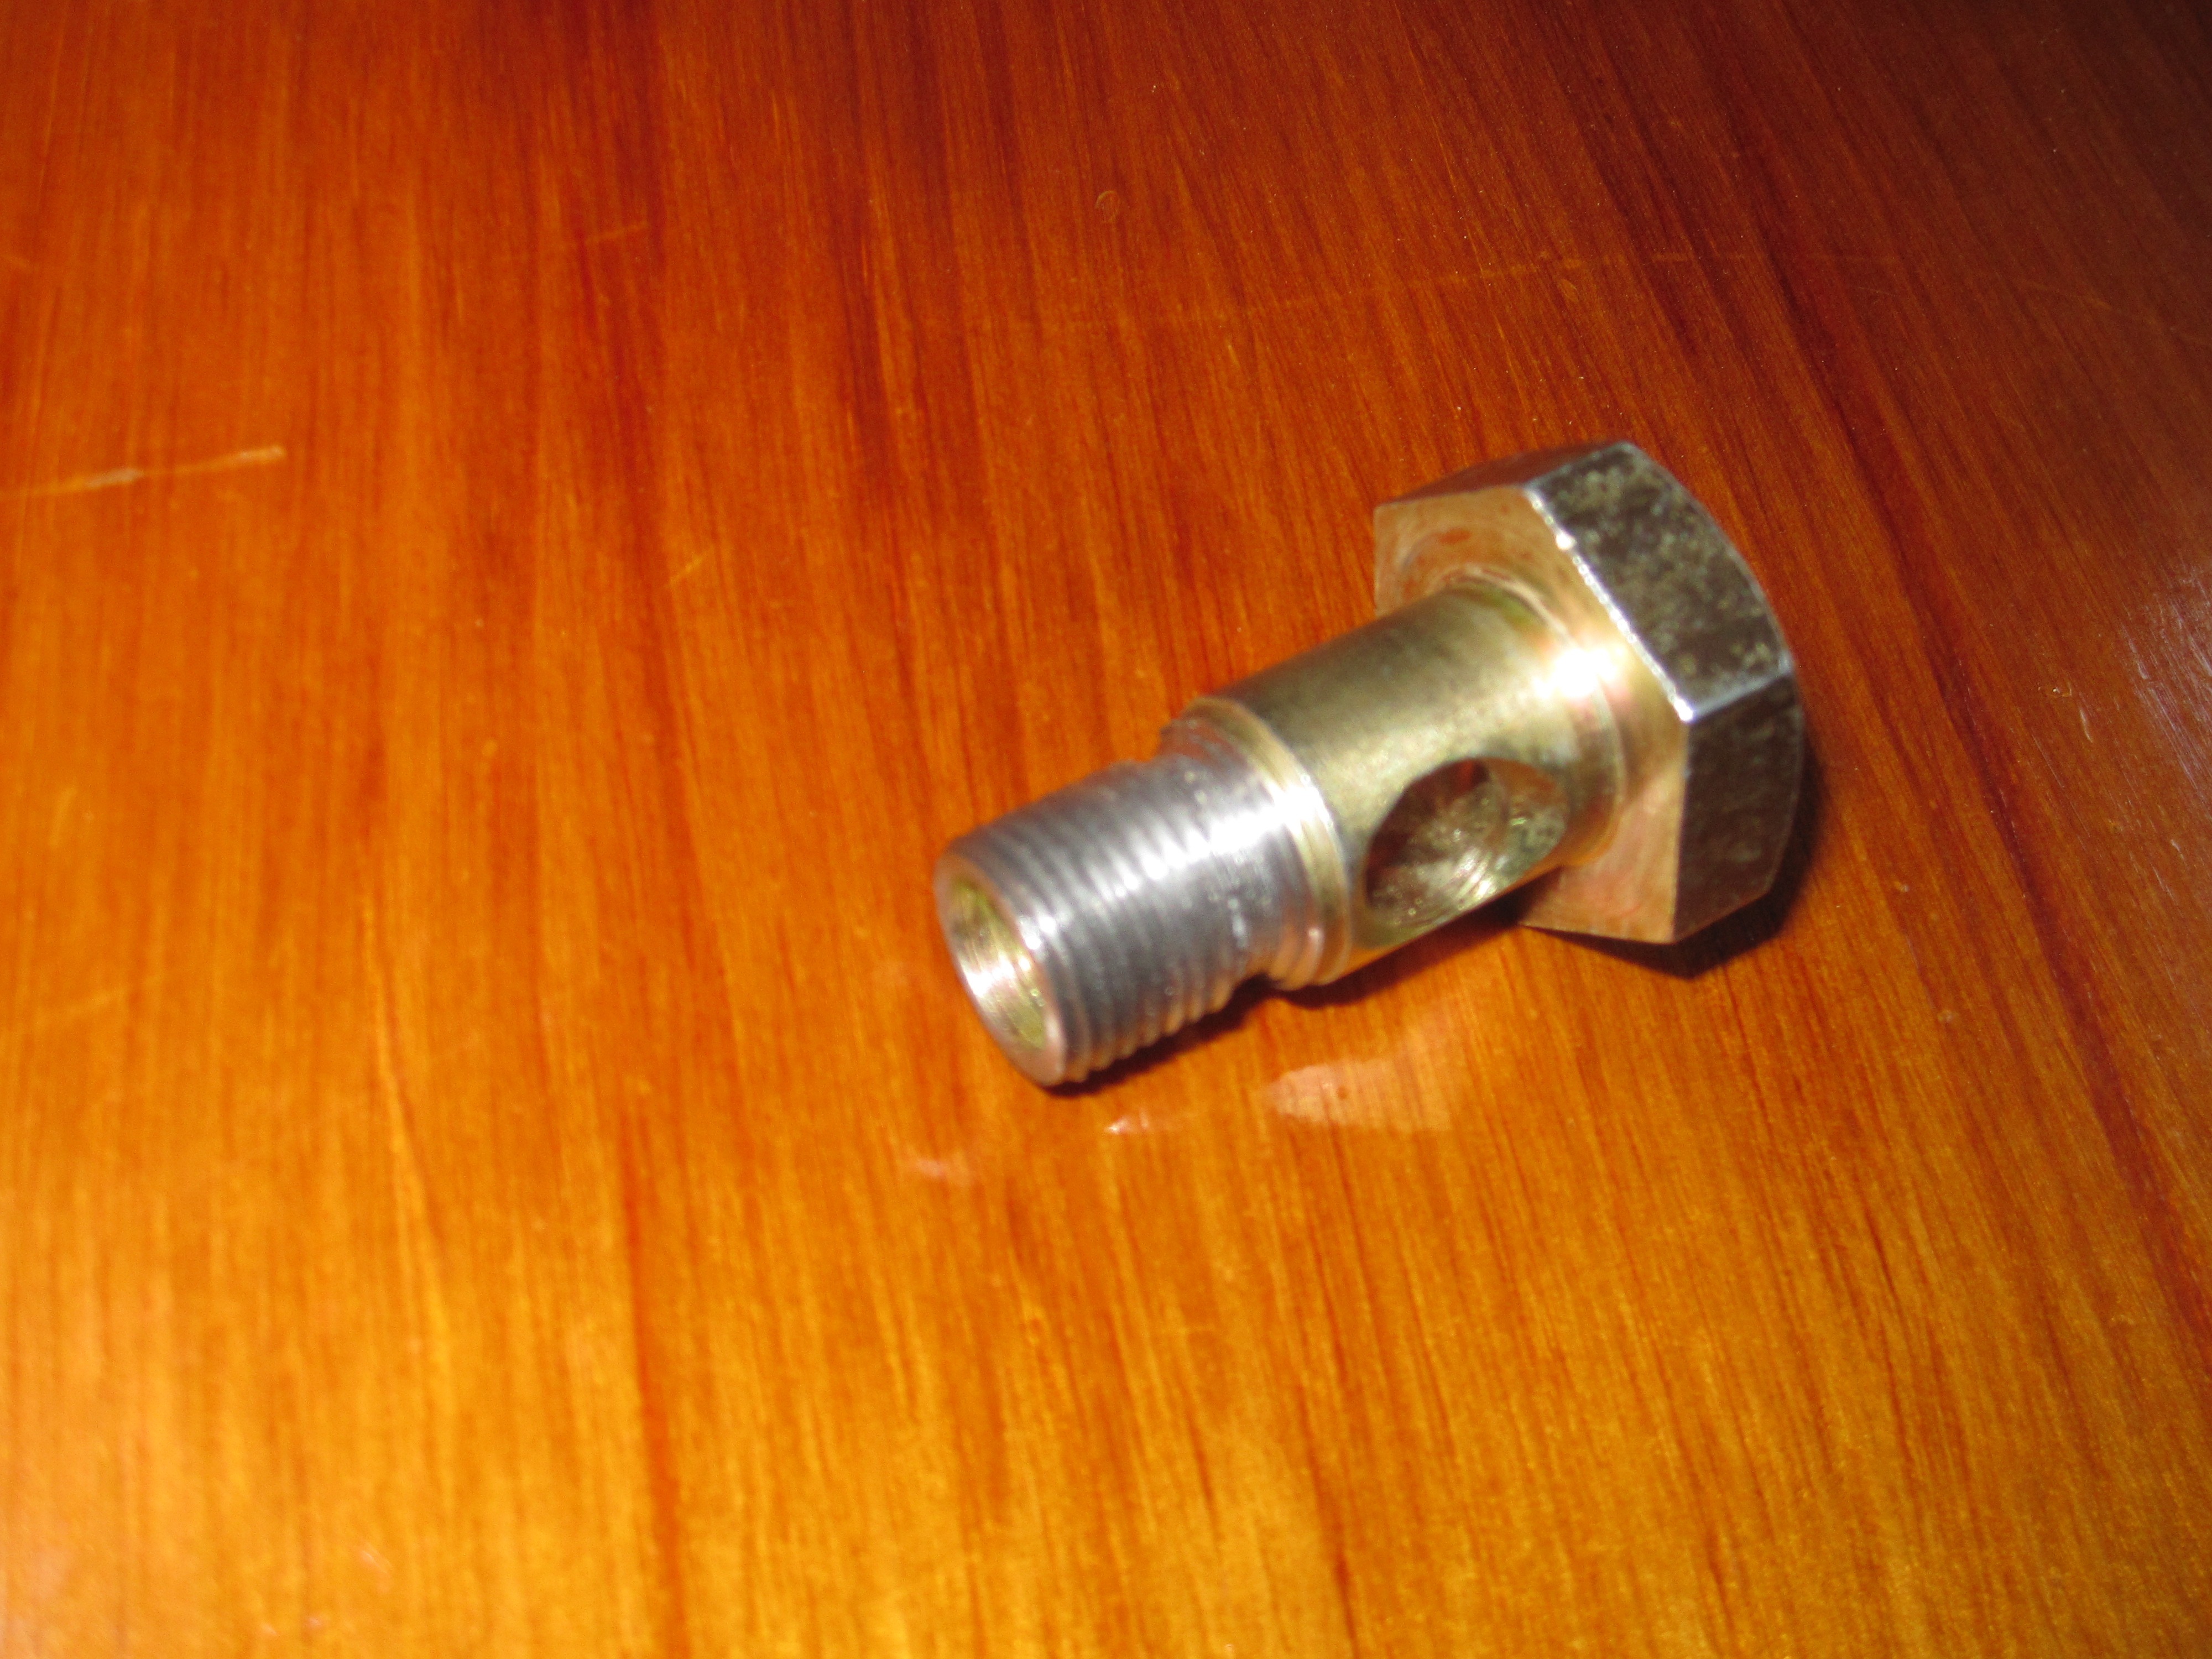
UPDATE: OOPS!
Maybe I overworked the Bolens’s elderly drive line, but after a day of hauling firewood out to the splitter, something broke and I heard a loud scratching sound as it came to a stop. Much probing with a lighted camera eventually led to a stripped spline boss on the shaft that links the clutch to the transmission. It’s a shaft about the diameter of my finger, yet it and this spline boss have had to take all of the torque this machine has ever produced.
The good news is that the part is available, if expensive. The bad news is that I have to learn how to split the tractor in half in order to effect the repair.
Oh well, I was looking for a project for the auto shop this winter. This should do the trick nicely.
Meanwhile, my 1947 Massey Ferguson 30 is making short work of firewood hauls that strained the G174. All is far from lost in the hydraulic project: its purpose was to free up the Kubota B7510 for use on the block splitter throughout firewood season. The ‘Bota’s pump is much more powerful than the TAFE 35DI’s and it runs the spitter quickly and well.
The Broken Tap
September 18, 2013
Roz starts a post-doc at the University of British Columbia in a couple of weeks, so they’re moving to Vancouver.
I’ve been driving for three days: hauling Charlie and Roz’s stuff “home” from Kingston for storage (2 trips) and running in to Stittsville yesterday after a tap extractor.
Therein lies a tale.
A Porsche 996 will accept roof racks. They cost $350 US and they bolt into specific fittings in the roof which are hidden below tiny doors which fold open to accommodate them. The threads are kept fresh by the insertion of soft metal plugs in the holes, which of course corrode in place, and are so soft that three in four had to be drilled out on our son’s 1999 model.
So Charlie drilled away, tapping new threads in as he went. This is a fussy job because the headliner is right below the mechanism and tight to it. This eliminates the use of penetrating oil or any other lubricant as a strategy when the headliner is made of light brown leather.
Things went well until I came out to the shop to see how it was going. Charlie was talking to me at the time, and thus a bit distracted while removing the tap from the last hole. It bound a bit. He twisted and POP! The tap broke off in the hole.
Nothing worked. He took the car to a machinist in Kingston on the assumption they would have a tap extractor. They didn’t. The idiot made a mess of it until Charlie took the car away from him.
I googled until I found a firm in Stittsville, Newman Tools Inc., which keeps them in stock. 3 hours later I was back and Charlie had the broken tap out. Then he drilled and tapped the hole oversized for an insert left over from the thread-repair kit for the engine job on the 968 he sold to buy this one.
Order restored. Now Charlie can install the racks, load up the bikes, and drive to Vancouver with a carload of cutlery and bedding. The rest he’ll buy at Ikea in time for Roz’s arrival by airplane.
But first, a last weekend at Mosport with the new car (without racks).

UPDATE, 2 October, 2012:
The bikes rode well on the new racks and Charlie arrived in Vancouver on schedule, quite pleased with the 996’s performance and the respect other drivers give it on the road. We’re still mailing boxes of essentials which wouldn’t fit into the car, but the epic journey across the northwestern states went well.
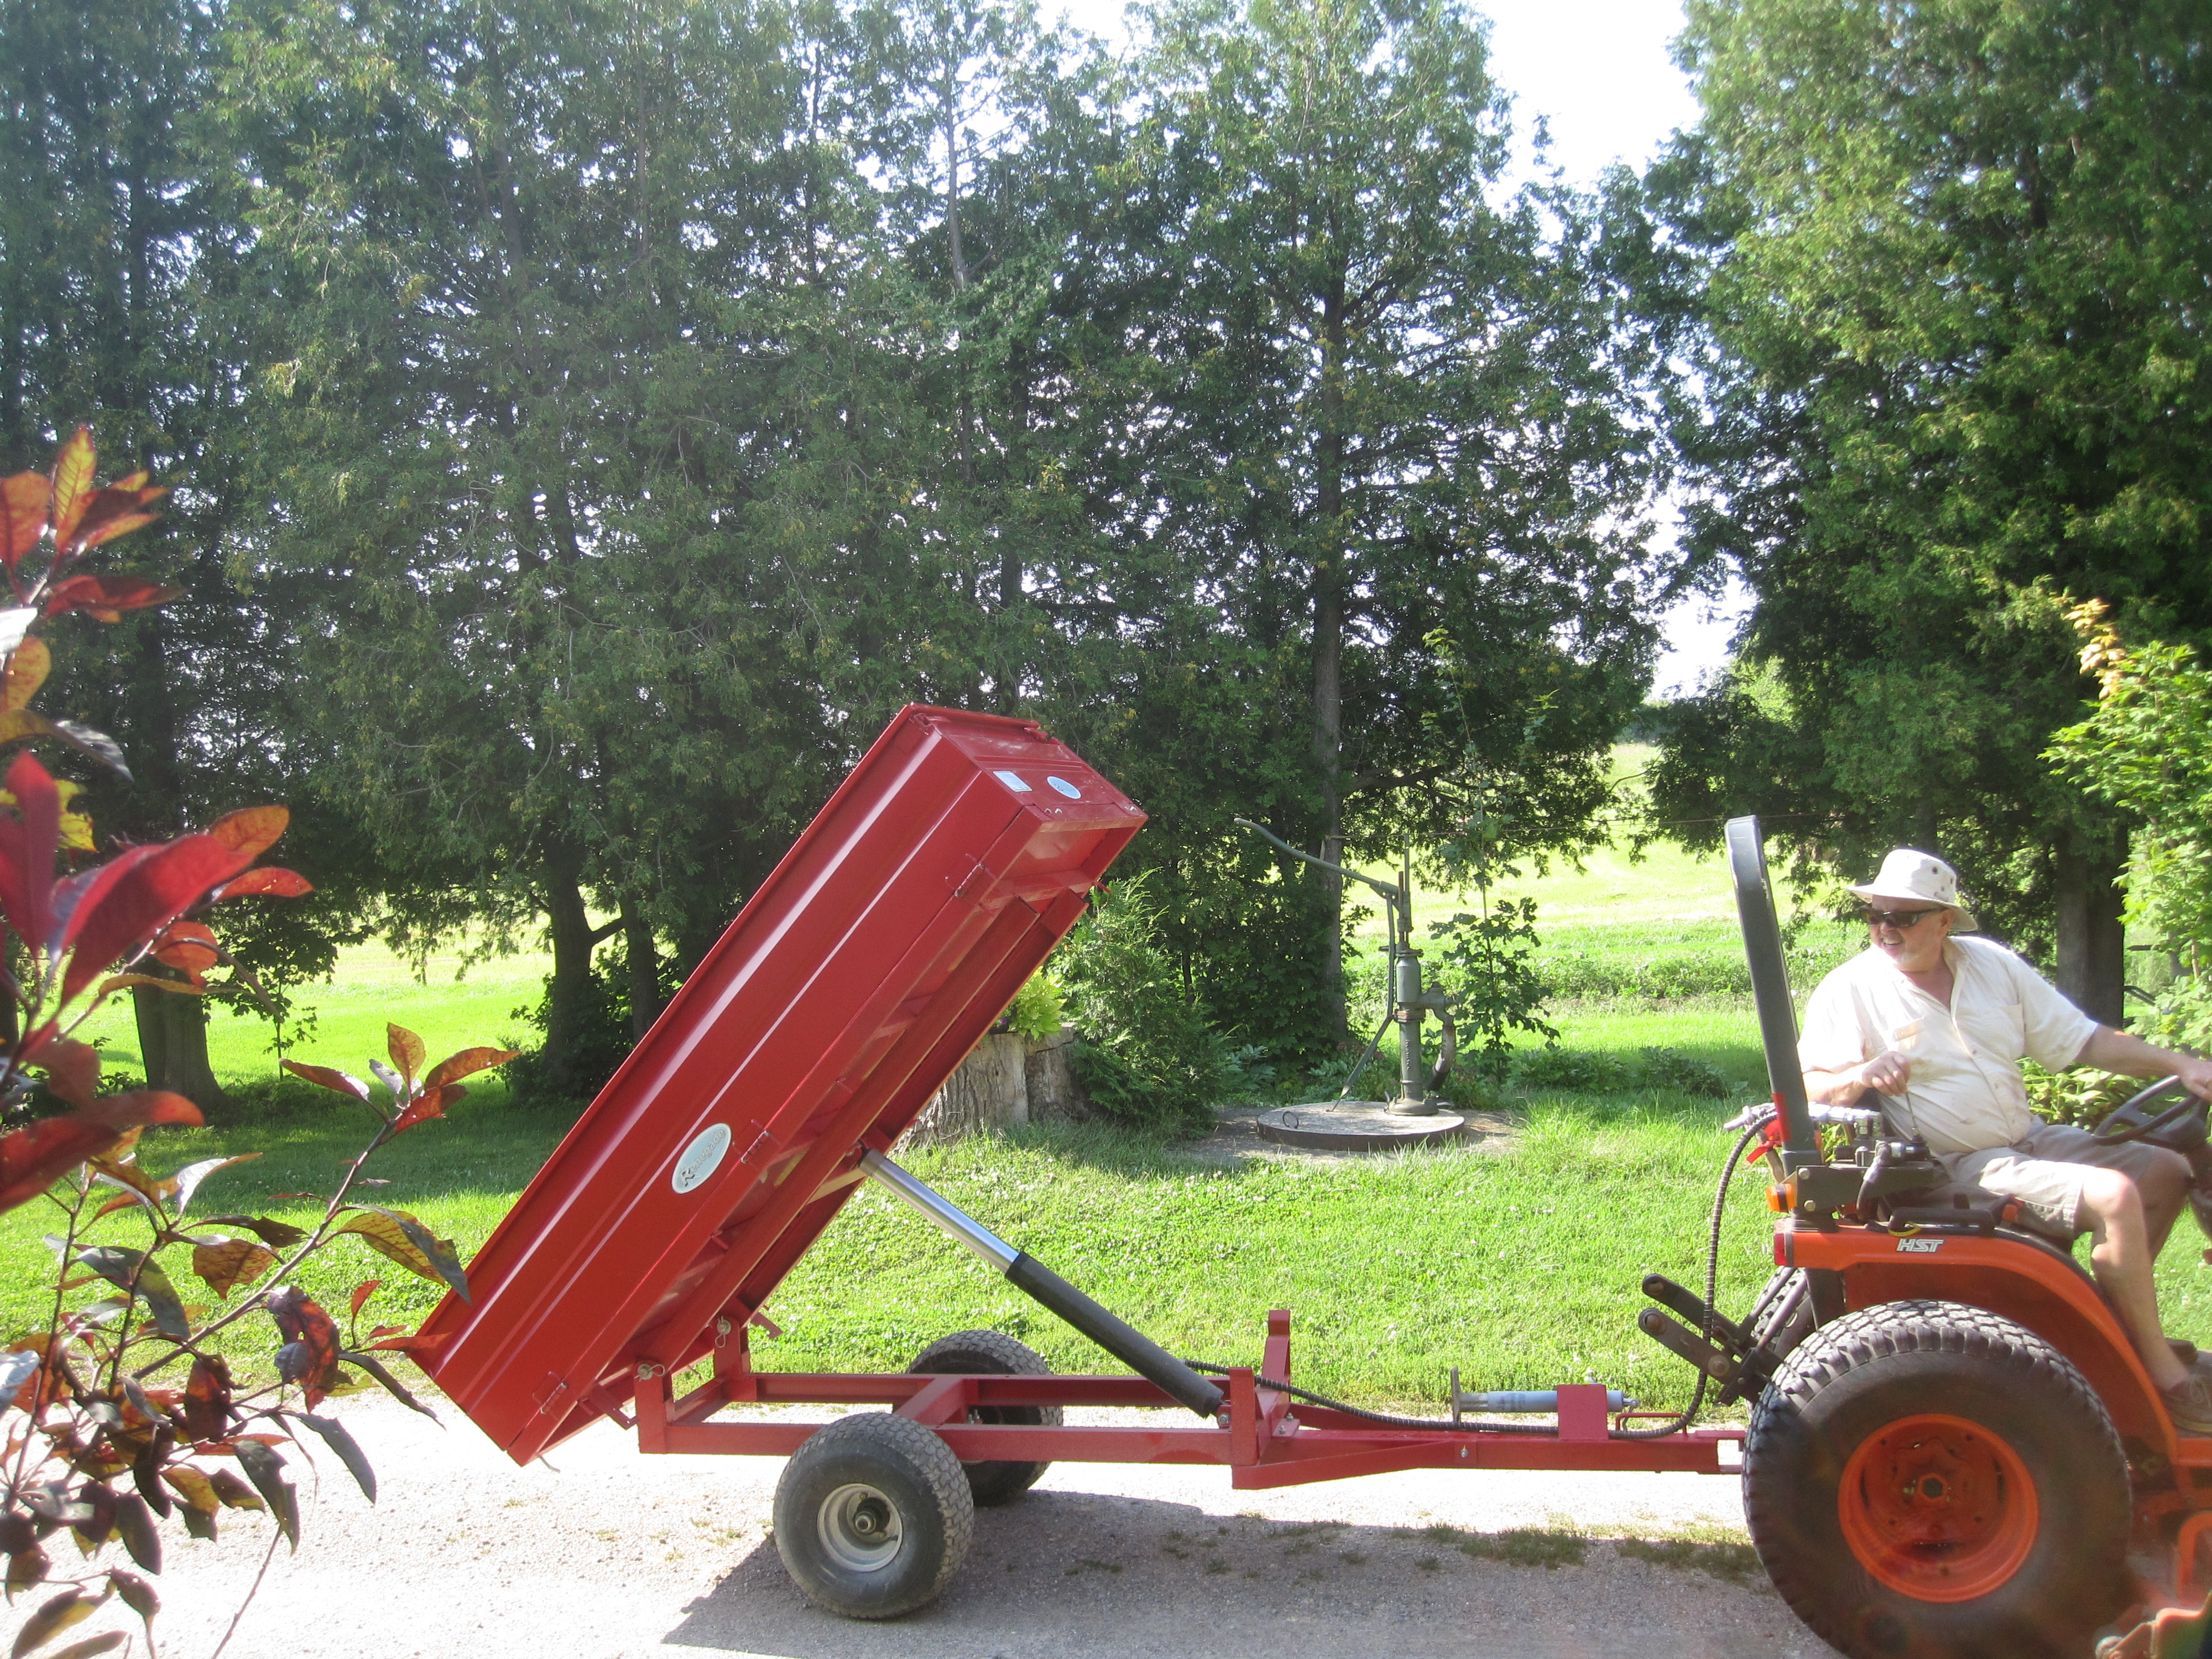
The Hydraulic Dump Trailer (Part II)
September 3, 2013

No buyer’s remorse yet.
Yesterday’s task involved the collection of a couple of loads of scattered walnut branches from the pruning of a three-acre patch of seedlings. I liked the combination of the HSD Kubota and the narrow trailer. When working alone one appreciates the ability to leave a machine simply by stepping off. The last time we did this task I pressed my wife into driving the Bolens G174 on a 4X6 utility trailer. The trailer was a tough fit through some areas of the nursery, and of course the geared Bolens is hard to get on and off, so a driver was needed.
Unloading branches packed into the box of a utility trailer is a drag. In anticipation I had removed the tailgate from the new dump trailer. I just backed each load up to the compost pile, tipped, moved ahead a bit, lowered and drove away. Beautiful.
But today was the real test. An excavation contractor sells gravel, fill and topsoil from his yard two miles along the county road in Crosby. Our driveway needed some work, so I resolved to walk the Kubota up to Crosby for a yard or two of gravel. I had inflated the tires to 30 lb for the project. The loader operators were careful sprinkling gravel into the apparently-fragile trailer box. I made two round trips. Each took 54 minutes, including unloading. The turf tires warmed up, but the bearings remained cool.
To unload the gravel I removed the bottom pins of the tailgate to make a little dump truck. This allowed the load to spill out while supporting top corners of the side panels against the rush of aggregate. The second load was considerably heavier than the first, nearly filling the box.
The hoist wouldn’t lift the slightly forward-biased load when it came time to dump.
When I first bought the tractor I discovered that the auxiliary outlet tested at 2600 p.s.i. and the book said 1900, so with my neighbour Peter’s help I turned it down to 2000 p.s.i. Today I reversed the procedure, tightening the screw first a quarter turn, and then another quarter turn, until the hoist could lift the heavy load. My neighbour had told me that that relief valve has no effect upon the rest of the tractor, and at worst a hose might spring a leak from the extra pressure.
With the corrected pressure setting on the tipping lever, the dump went well. I see no reason why this little hydraulic trailer shouldn’t see a lot of (admittedly careful) use over the next few years.
The Hydraulic Dump Trailer (Part I)
September 2, 2013
It looked too fragile to work, even in the Kijiji ad. I kept looking. But tipping trailers in North America are for the highway, to be towed by huge pickup trucks, cost a great deal of money, and take up too much space.
I needed a replacement for my trusty red 4X6 trailer which had served since 1995 as a mobile workshop, tool hauler, crushed stone and sand hauler, and so on. More times than I can count I took it through the scales at the quarry with upwards of 3400 pounds of payload. It was also narrow enough to back in the long alley at Martin’s house in Kingston, so it had the honour of emptying his backyard on several occasions after his year-long renovation.
Speaking of renovations, that’s why I wanted a trailer this time which could dump. Clotted shingles are a royal pain to unload from a trailer. There must be a better way (this side of hiring a contractor) than forking them out of a metal box.
It was a load of shingles which did Little Red in. The counter guy at Rideau Lumber turned out to be a fine salesman, and before I knew what had happened I had agreed to the purchase of 28 bundles of shingles, which the fork lift operator cheerfully plumped onto the trailer and slid the pallet neatly into position for the trip to Forfar. My tires were fine, but the axle broke on the first corner, plumb rusted through. Determined to prevent a traffic jam, I dragged the disabled trailer to a quiet spot, and then tried to get back to the Rideau Lumber yard with the right tire rubbing against the box to support the weight of the shingles. The tire and wheel gave up with a loud bang a block short of refuge. The Rideau Lumber boom truck responded to my call for help and loaded the shingles onto its commodious bed, and almost as an afterthought, my wounded trailer as well. Little Red made what turned out to be its first final trip home.
I couldn’t find a replacement for a heavy duty 4X6 trailer. They don’t seem to make them any more. So it sat there in the yard, scrap metal, until Princess Auto had a sale on axles, wheels and tires. $400 and a morning of work and Little Red was back from trailer heaven.
But all was not well. Red’s fenders were rusted through. The tail gate required a sledge hammer to open and close. A winter of neglect with a load of salted sand pretty well did the poor old trailer in. After a trip to the quarry last week I had to use a bar clamp to pull the sides together to enable the sledge hammer to do its work. Little Red was past its useful service life, suitable now only for lending to friends who didn’t check for running lights, or for storing scaffold.
So I revisited the dump-trailer ads. A beauty turned up on Kijiji for $3200., everything I could want in a dump trailer, and more. It was the “more” which gave me pause. My old Tacoma can only tow 3500 pounds, and this new trailer could easily haul twice that with its brakes. But a precious implement like this new one would need indoor storage, and that would mean seven feet of width in a 20′ wide building. I could put a boat or a sports car in that space. And the 4X6 is already too wide for some of the trails in the woodlot and the aisles among my 15,000 little trees. So the Hamilton hydraulic trailer would end up a highway vehicle, used about ten days per year.
Truth? I shuddered at the thought of two trips across Toronto in my stiffly-clutched truck. My last trip took an hour and 56 minutes in bumper-to-bumper traffic and I spent the last half terrified my clutch leg would give out before I could find a gravel shoulder. It’s possible to feel claustrophobia on an eight-lane freeway and I had no desire to repeat the experience.
Perhaps “Almost everything you always wanted in a trailer (in the Ottawa area)” would be a better approach. I called the flimsy trailer dealer again. He seemed confident in the product because he had sold a lot of them and his mechanic has one on his hobby farm. I asked him to explain why the hoist uses one hose only: where does the oil go on the return trip? His answer was basically, “It works. Come and look.” So I drove two hours north with the trailer we built for the Ranger attached.
The sides looked light and flimsy, but as the-mechanic-who-owns-one explained, “Look at the underside. It’s very strong.” He ran the hoist up to reveal the heavy metal underneath. Without trepidation I stepped onto the again-horizontal bed. “I haul 10′ logs out of the woods on it. I just take off the sides and the front and tie the logs on. It works fine behind my 60 hp tractor. I have also heaped it with sand and gravel. To dump gravel I disconnect the bottom of the tailgate so it works like a little dump truck and still supports the sides.”
Perhaps because I didn’t know how I would use the thing, I asked them to load it up, and home we went. Buyer’s remorse could come later.